Shelly 2.5 Switch and Openhab2
Install your Shelly 2.5 switch and connect it to your Openhab2 home automation system.
I have recently started to make my home "smart". Since I did not want to put new cables into the walls I was looking for "in-wall-connector" hardware to steer my switches and my roller shutters. I found Shelly, and was impressed right away. I started with some Shelly 1 for my normal switches. There is a great video here no how to install them: https://www.youtube.com/watch?v=V2aWc_caE5k&t=369s
In some areas in my house I have double switches, e.g. to switch on one half of the lights and then the other half. For these kind of things the Shelly 2.5 is perfect to make the steering smart. I am also already having a Openhab2 installation running, to steer my smart home.
Wiring of the Shelly 2.5
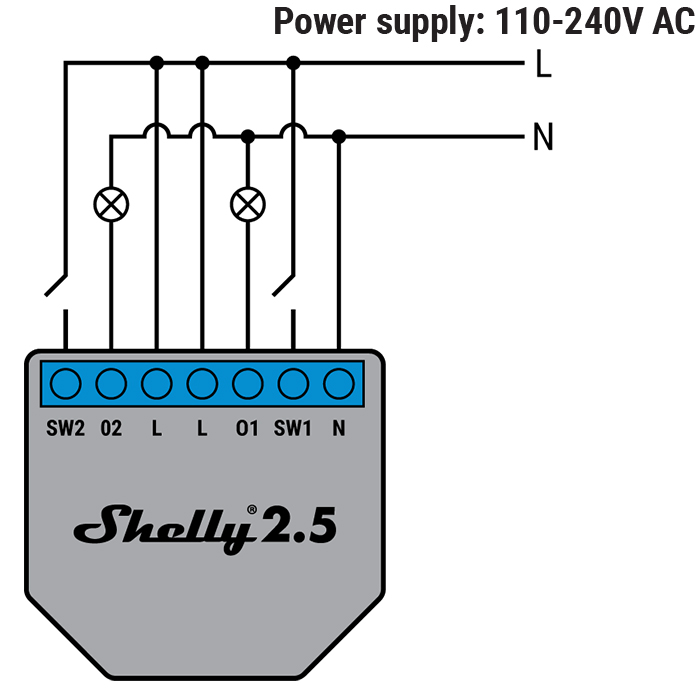
A Shelly 2.5 comes with two Switches (SW1, SW2), two Outputs (O1, O2), the phase (L, L) and a Neutral (N) link for the power. The picture below shows this again (Picture taken from https://shelly.cloud/knowledge-base/devices/shelly-25/)
Before starting to do the wiring, I have of course taken off the power by turning off the fuse for the power cycle.
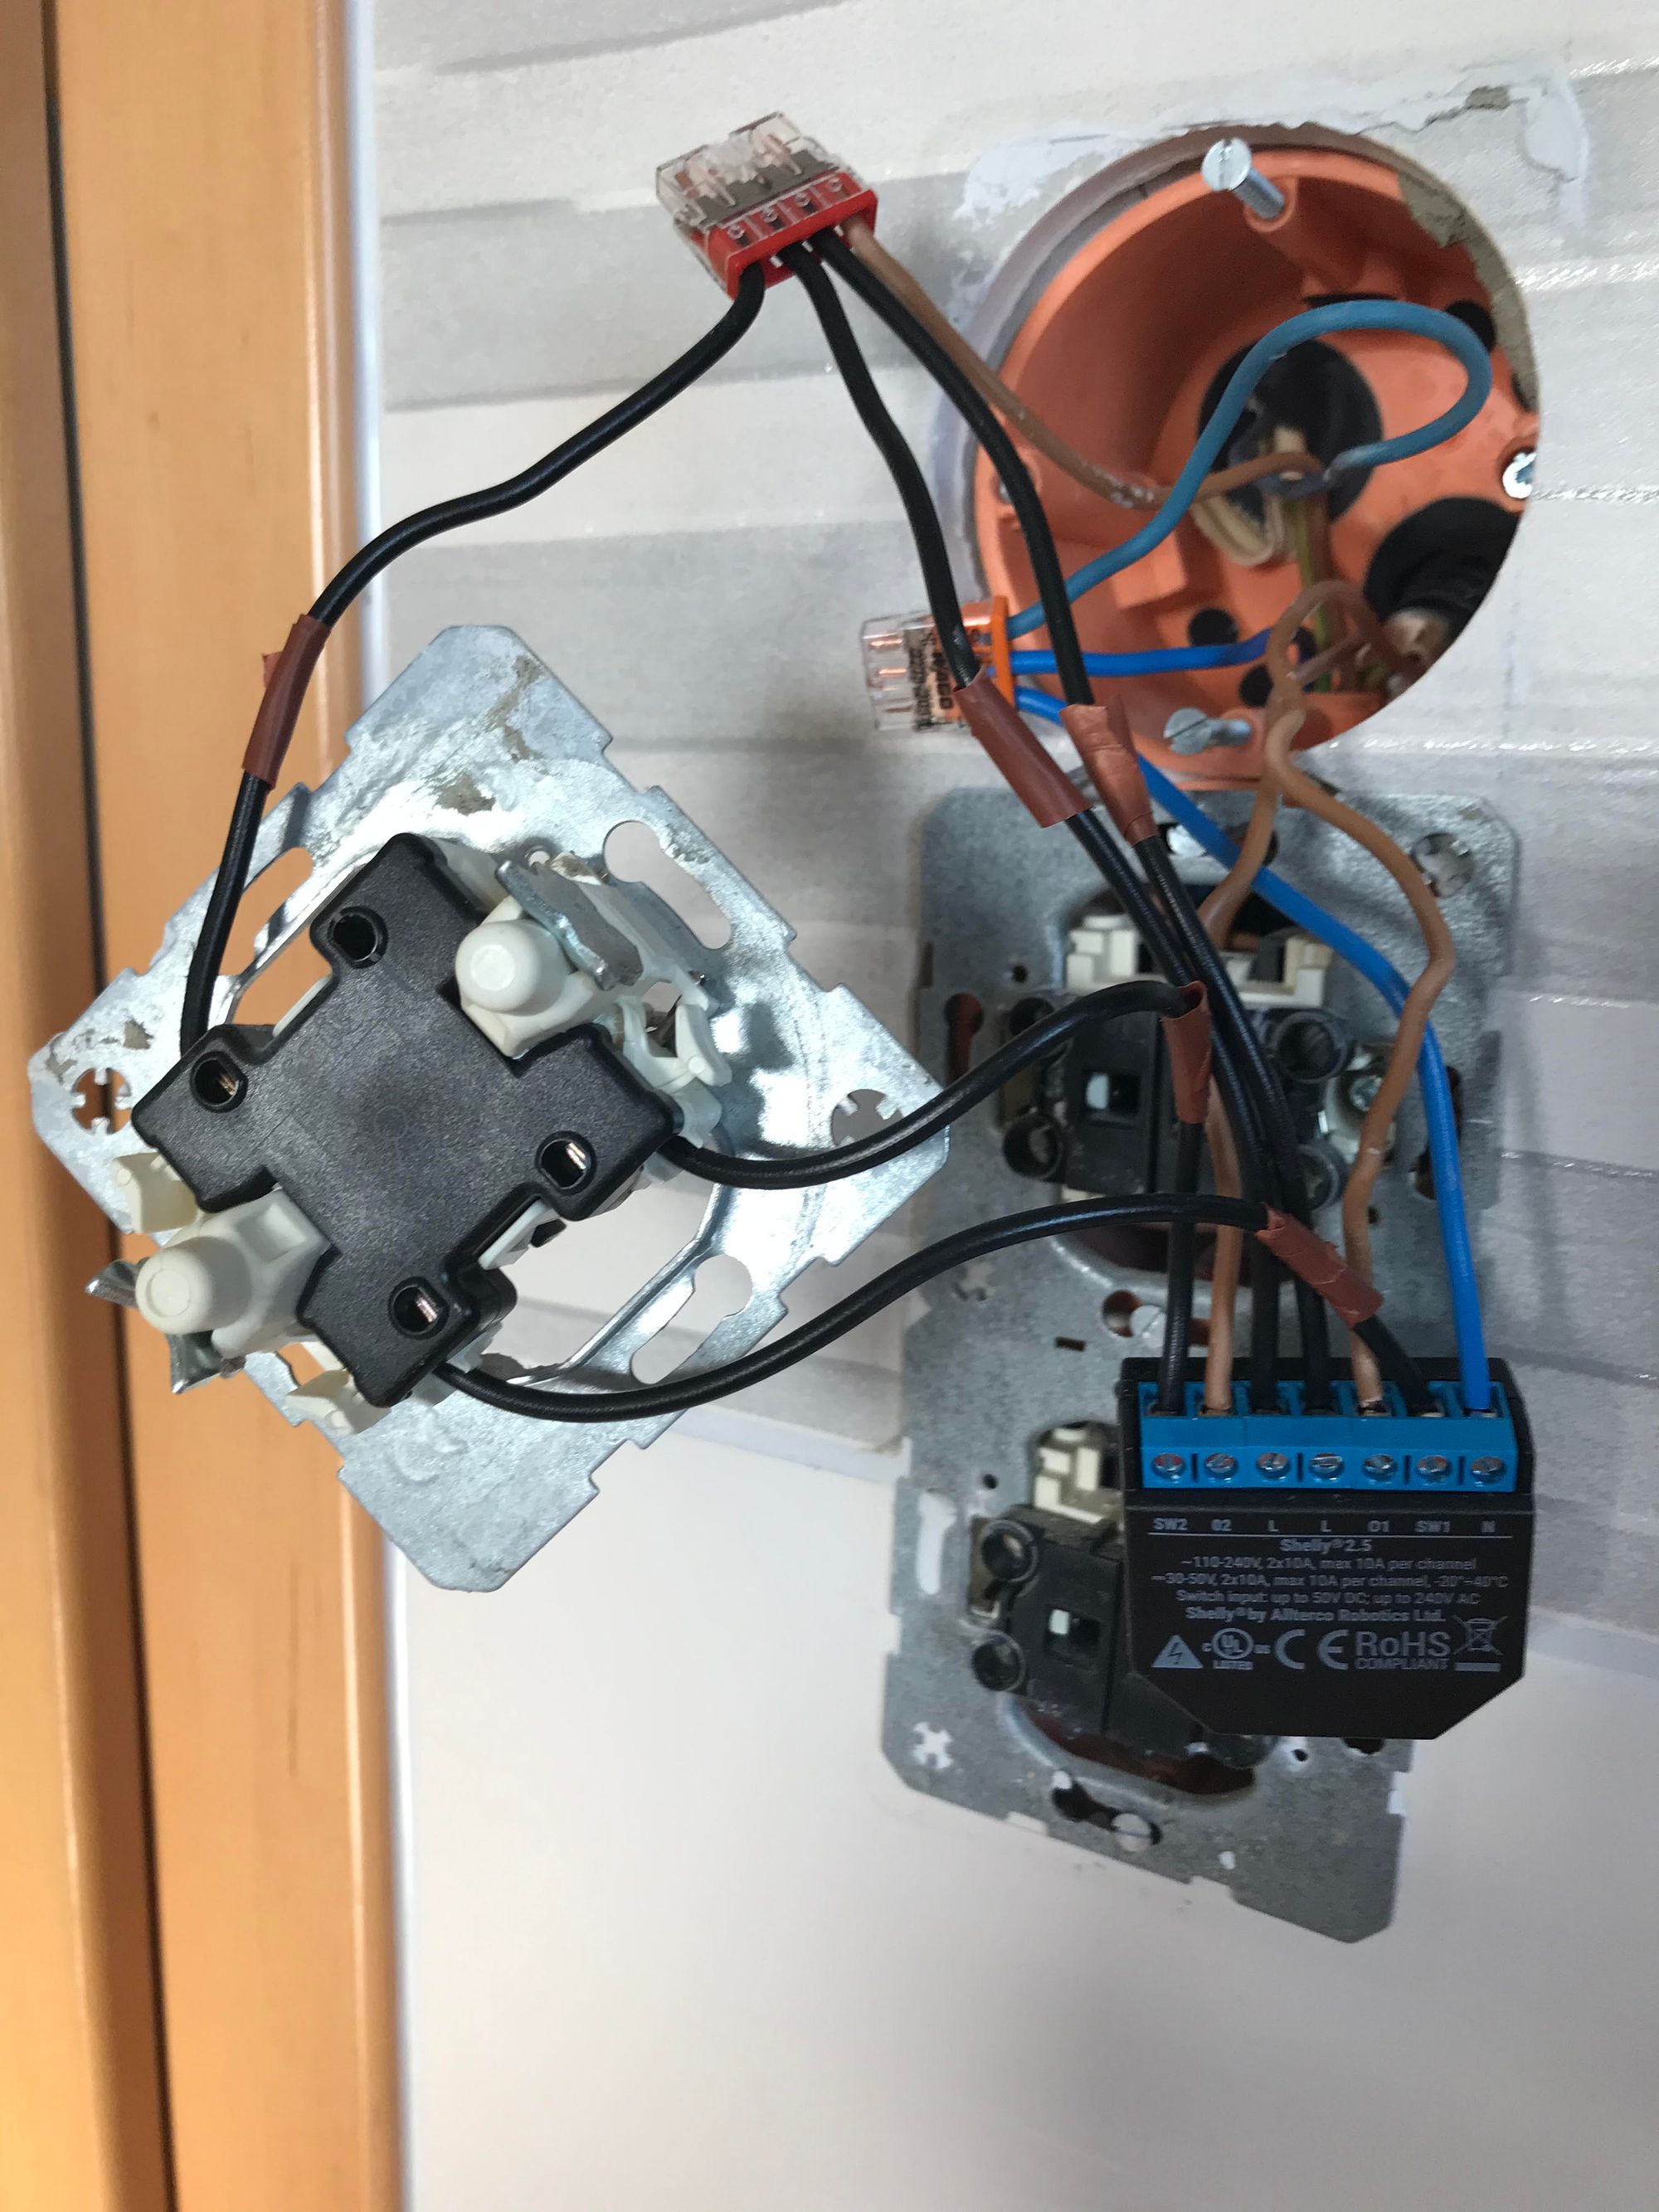
In order to make the shelly work, I first connected the N link to the neutral wire (typically blue) in my box. After that I have loosened the first output and connected it to O1. The SW1 I have connected to the output 1 of the switch. Then I have done the same thing for the second switch: Output 2 of the switch connected with O2 and SW2 connected with the output 2. The incoming phase I have put on a Wago clip and connected it to L and L and also to the L of the switch. In the end it looks like this:
After having done all the wiring, put the fuse back in and then you can test if the switch is still working.
Configuration of the Shelly 2.5
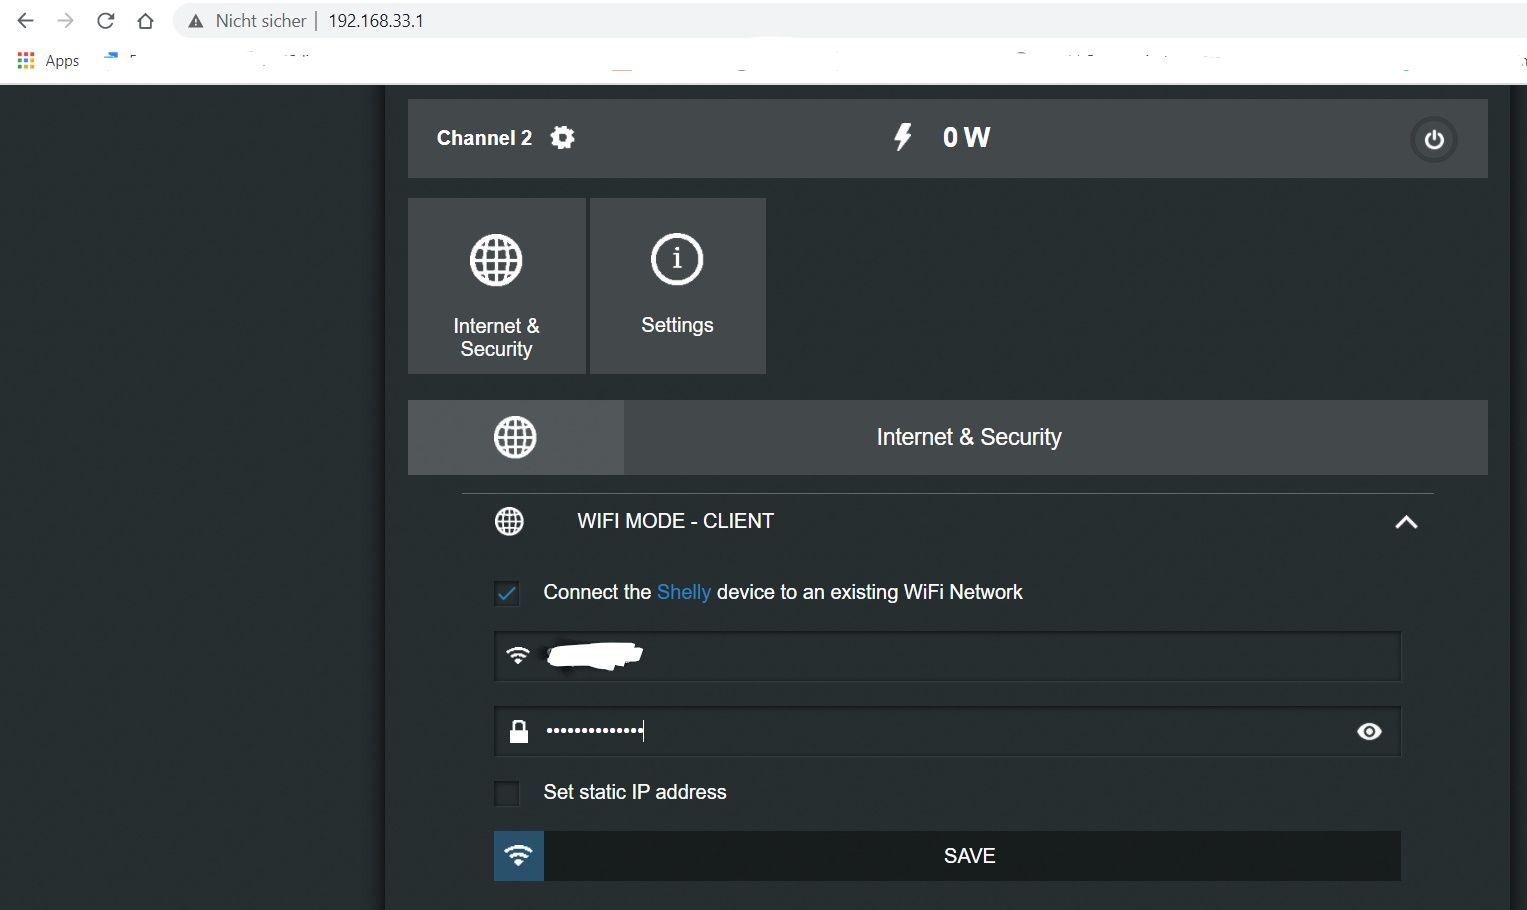
The configuration of the Shelly 2.5 can be done via the Shelly app. I am typically doing this via the web interface: Both works perfectly fine, I am just preferring the web interface. In order to connect to the web interface connect to the WiFi the shelly has opened, which is called Shelly-<ID of the Shelly>. You have to be pretty close to the Shelly to see the WiFi. Once connected, you can open the Web Interface by typing 192.168.33.1 in your browser.
Once you see the Web Interface you have to connect the Shelly to your network. This can be done by going to Settings -> Internet & Security -> WiFi Client Mode. Check "Connect the Shelly device to an existing WiFi network" and enter the WiFi name and the password.
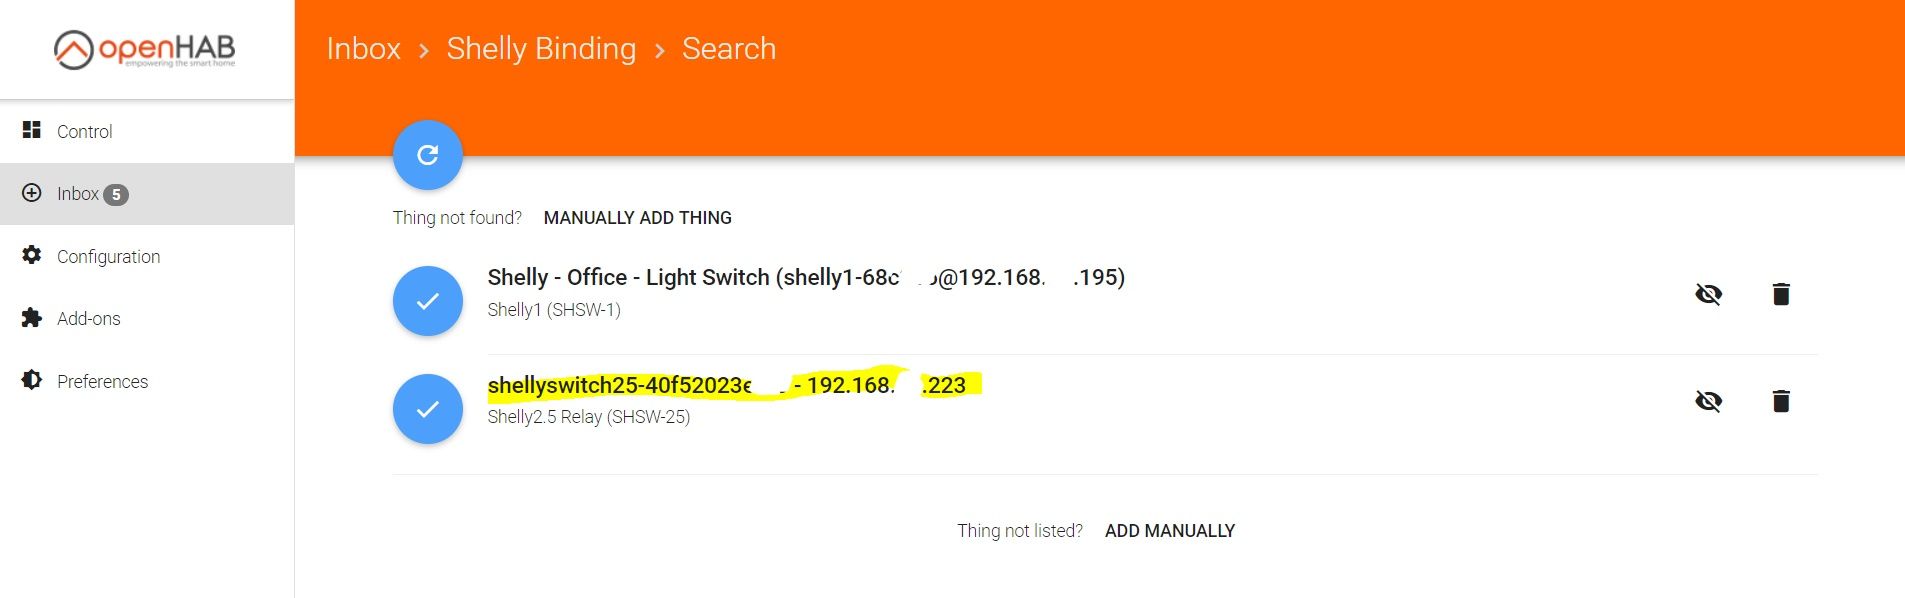
You can set a static IP address, I have done this on my router. Now your Shelly 2.5 will have a new IP address, which you have to figure out via your router or you guess it :) You can also easily find this out in your Openhab2 UI. In your Inbox you will have a new device showing you the IP and the ID.
Type in the IP in your browser to access the Shelly 2.5 Web Interface again.
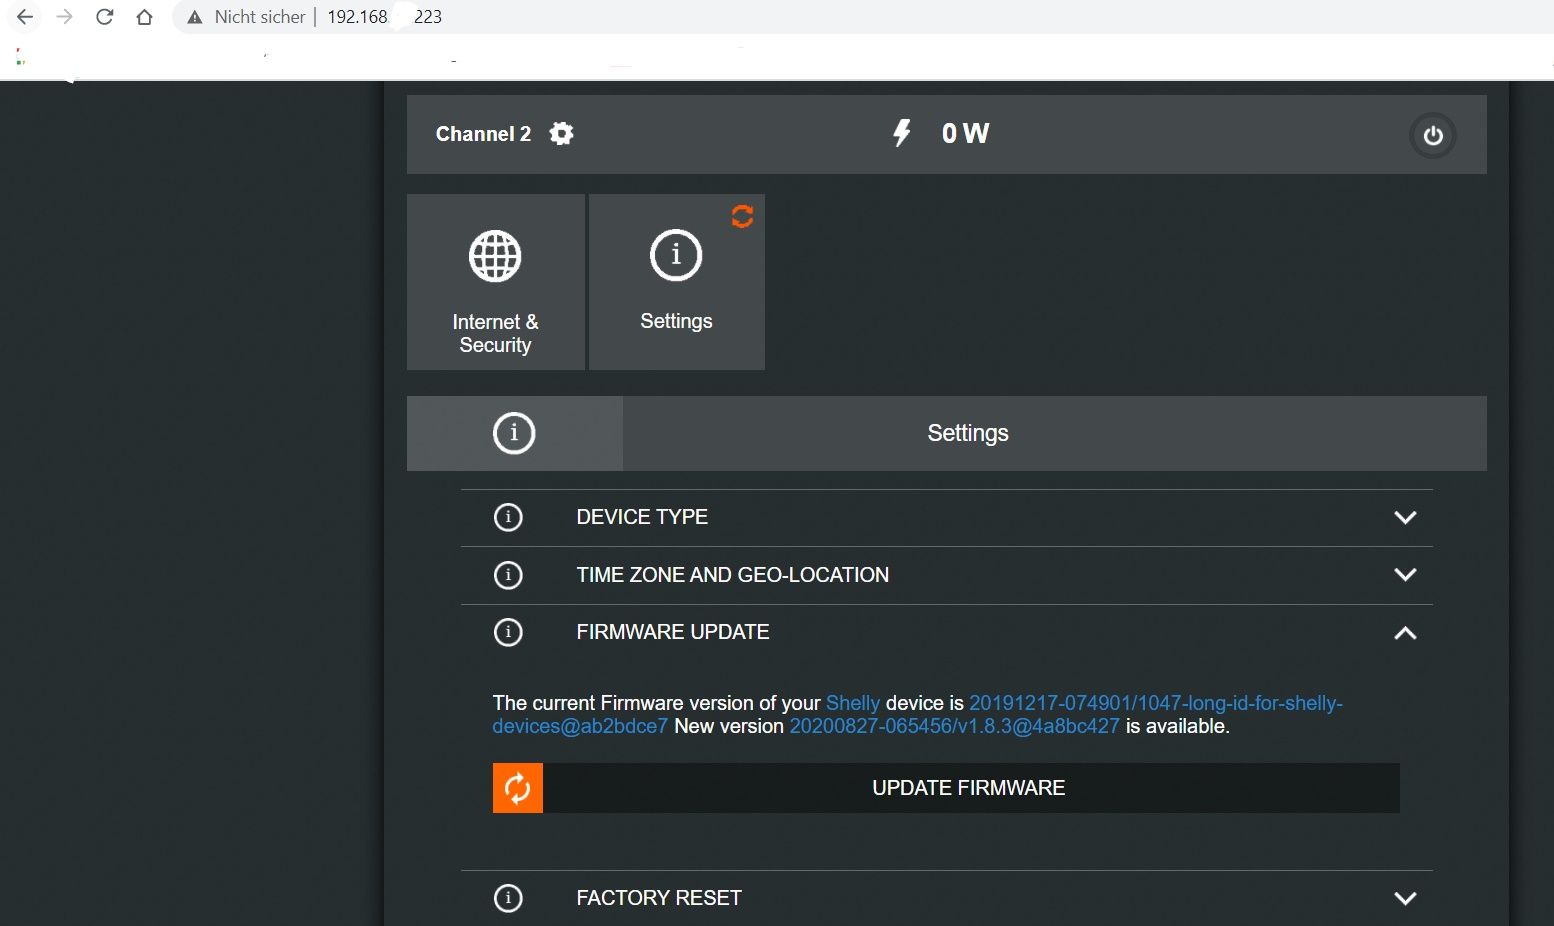
As last steps you should check for a firmware update under Settings -> Firmware Update.
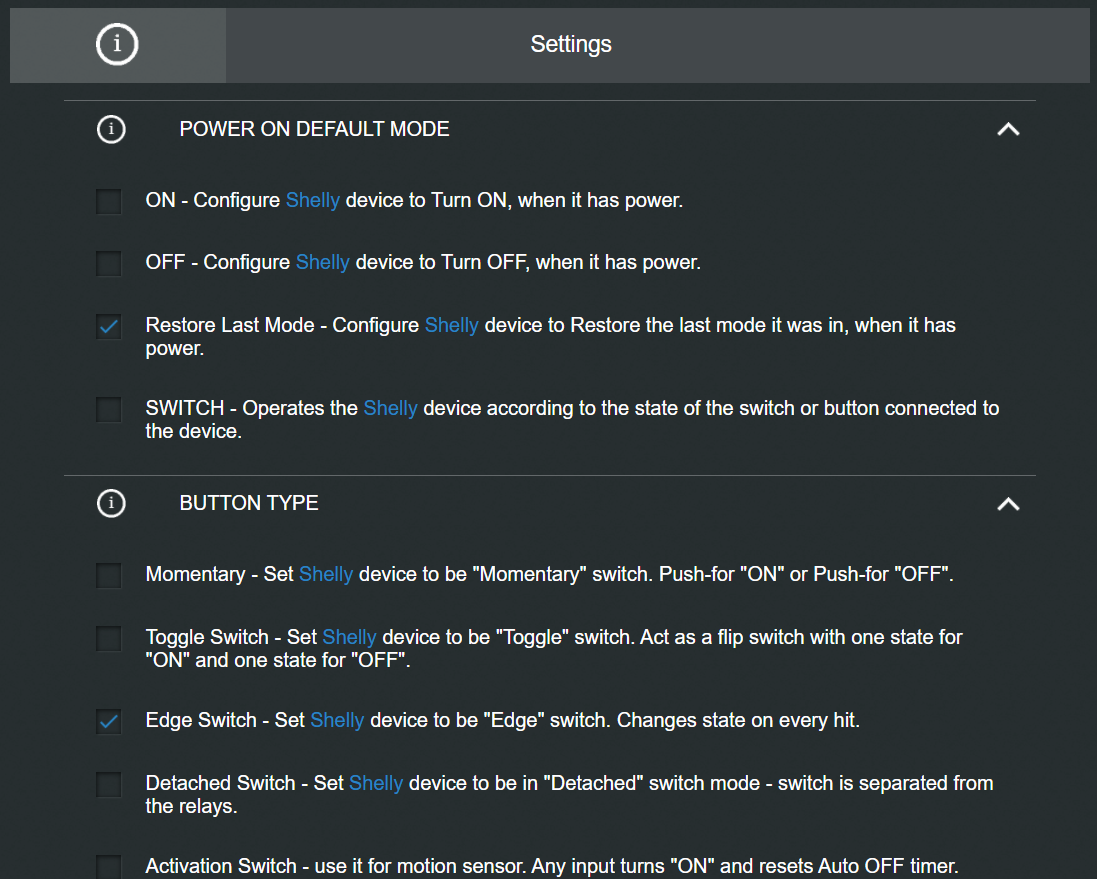
And set the "Power in default mode" to "Restore last mode" and the "Button type" to "Edge Switch".
Now you can steer your Shelly 2.5 via the Web Interface as well as via the hardware switch. Now let's bring the Shelly 2.5 into Openhab2.
Shelly 2.5 integration into Openhab2
If you have not installed Openhab2 yet, please check out the Openhab homepage on how to do it.
I am doing all Openhab configurations in the file system and not via the Openhab UI. This has some advantages, especially that I can back it up easily and also upgrades or moving Openhab2 to a different host it is pretty straight forward.
In order to make the Shelly 2.5 working in your Openhab2 you will have to edit the following files:
- /etc/openhab2/things/default.things
Thing shelly:shelly25-relay:40f52023XXXX "Light Switch Bath First Floor (40f52023xxxx)" @ "Bathroom First Floor" [deviceIp="192.168.xx.223", userId="", password=""]- This adds the Shelly 2.5 to your Openhab2 things so that you can use it for a binding
- /etc/openhab2/items/default.items
Group:Switch:OR(ON, OFF) gFFBathroomLights "Light" <light> (Home) ["Lighting", "Switchable"]Switch FF_Bathroom_Light_1 "Left Light" <light> (gFFBathroomLights) ["Lighting", "Switchable"] {channel="shelly:shelly25-relay:40f52023XXXX:relay1#output"}Switch FF_Bathroom_Light_2 "Right Light" <light> (gFFBathroomLights) ["Lighting", "Switchable"] {channel="shelly:shelly25-relay:40f52023XXXX:relay2#output"}- Here we are creating one group (gFFBathroomLights) and two light switches on different relays of the Shelly 2.5 (FF_Bathroom_Light_1, FF_Bathroom_Light_2). The group is later used to turn on/off both lights at the same time.
- /etc/openhab2/sitemaps/default.sitemap
-
Text label="Bathroom" icon="bath" { Frame label="Lights" icon="light" { Switch item=gFFBathroomLights label="All lights" Text label="" icon="none" Switch item=FF_Bathroom_Light_1 Switch item=FF_Bathroom_Light_2 } } - Here we are adding the switches to the Sitemap so that we can use it on the Openhab2 UI. One switch is used to turn on/off both lights and then there are two single switches. The Text here is just an empty element.

-
That's it folks. Hope this helps you install your Shelly devices at home and connect them to Openhab.